
reality 节点搭建

reality 节点搭建
Diving Yuvless-reality 节点搭建
准备一个VPS
选择一家VPS厂商,获取一台VPS
节点搭建
查看操作系统和cpu架构
1 | uname -a |
Linux ser6.1.0-32-cloud-amd64 #1 SMP PREEMPT_DYNAMIC Debian 6.1.129-1 (2025-03-06) x86_64 Linux
1 | cat /etc/os-release |
NAME=“Alpine Linux” ID=alpine VERSION_ID=3.20.6 PRETTY_NAME=“Alpine Linux v3.20” HOME_URL=“https://alpinelinux.org/” BUG_REPORT_URL=“https://gitlab.alpinelinux.org/alpine/aports/-/issues”
1 | wget https://github.com/XTLS/Xray-core/releases/download/v25.6.8/Xray-linux-64.zip |
解压并进入解压后的目录
1 | unzip Xray-linux-64.zip -d xray && cd $_ |
节点配置
创建一个json文件(xray内核config.json),内容如下:
1 | { |
sing-box的reality json配置
1 | { |
需要修改的点
port: 随便填写, 如果是NAT机, 记得端口转发
id: 可以通过./xray uuid 生成target:- 获取方法
一、偷自己(需要有一个自己的域名)
安装caddy(配置文档), 选择合适自己服务器的版本. 下载并解压缩
1
wget https://github.com/caddyserver/caddy/releases/download/v2.10.0/caddy_2.10.0_linux_amd64.tar.gz
有三种方式,
通过HTTP自动获取证书(需要放开80端口),通过DNS申请域名证书(不需要开放80端口),手动申请证书并上传- 手动获取证书
1
bash <(curl -Ls https://gitlab.com/rwkgyg/acme-script/raw/main/acme.sh)
HTTP自动获取证书
1
2
3
4
5
6
7
//windows
netstat -ano | findstr :80
//linux
ss -tupln | grep ':80'
lsof -i :80
whereis apachectl
/usr/sbin/apachectl stopDNS自动获取证书
以
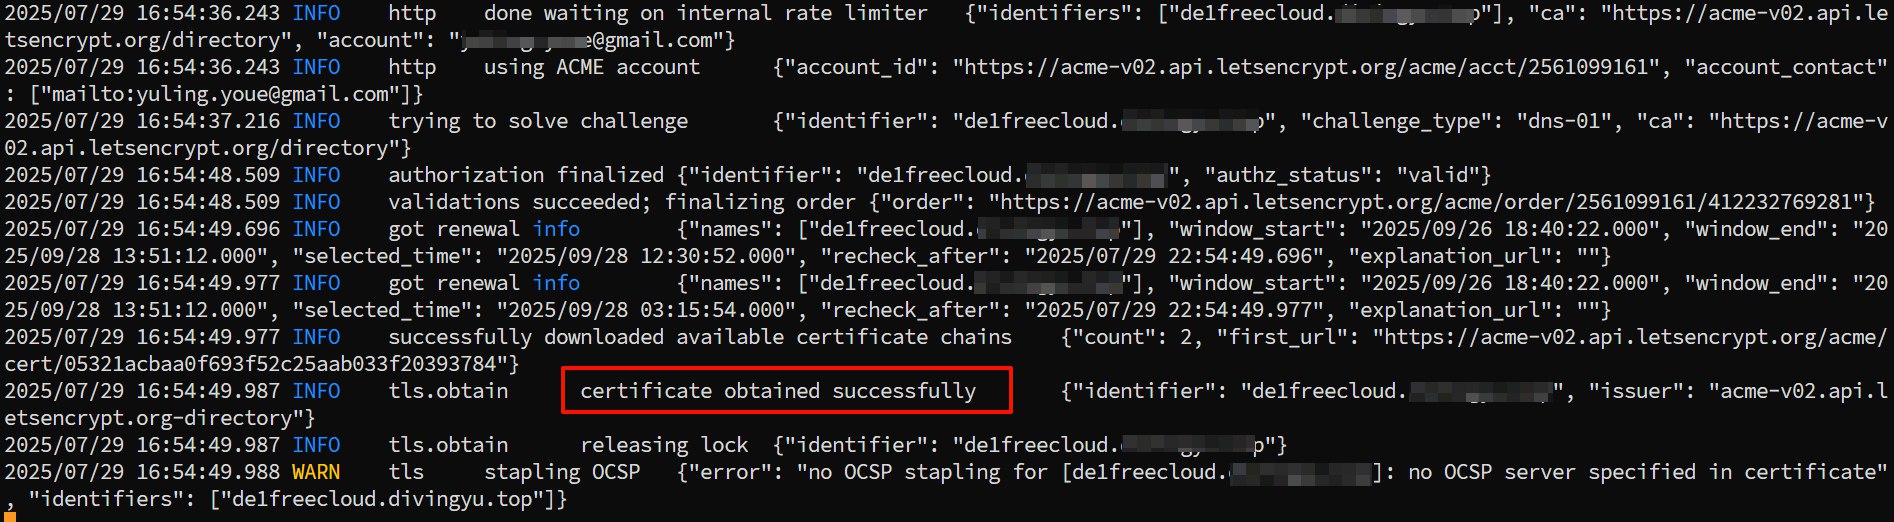
cloudflare为例, 通过DNS申请域名证书, 按上述下载的caddy可执行文件没有任何模块,需要通过xcaddy工具手动编译安装(通过caddy list-modules | grep cloudflare检查是否有cloudflare模块)1
2
3
4###下载xcaddy
wget https://github.com/caddyserver/xcaddy/releases/download/v0.4.4/xcaddy_0.4.4_linux_amd64.tar.gz
###构建携带cloudflare模块的caddy
./xcaddy build --with github.com/caddy-dns/cloudflare按上述操作可能会提示没有找到
go,需要安装go环境1
2
3
4wget https://go.dev/dl/go1.24.5.linux-amd64.tar.gz
rm -rf /usr/local/go && tar -C /usr/local -xzf go1.24.5.linux-amd64.tar.gz
export PATH=$PATH:/usr/local/go/bin
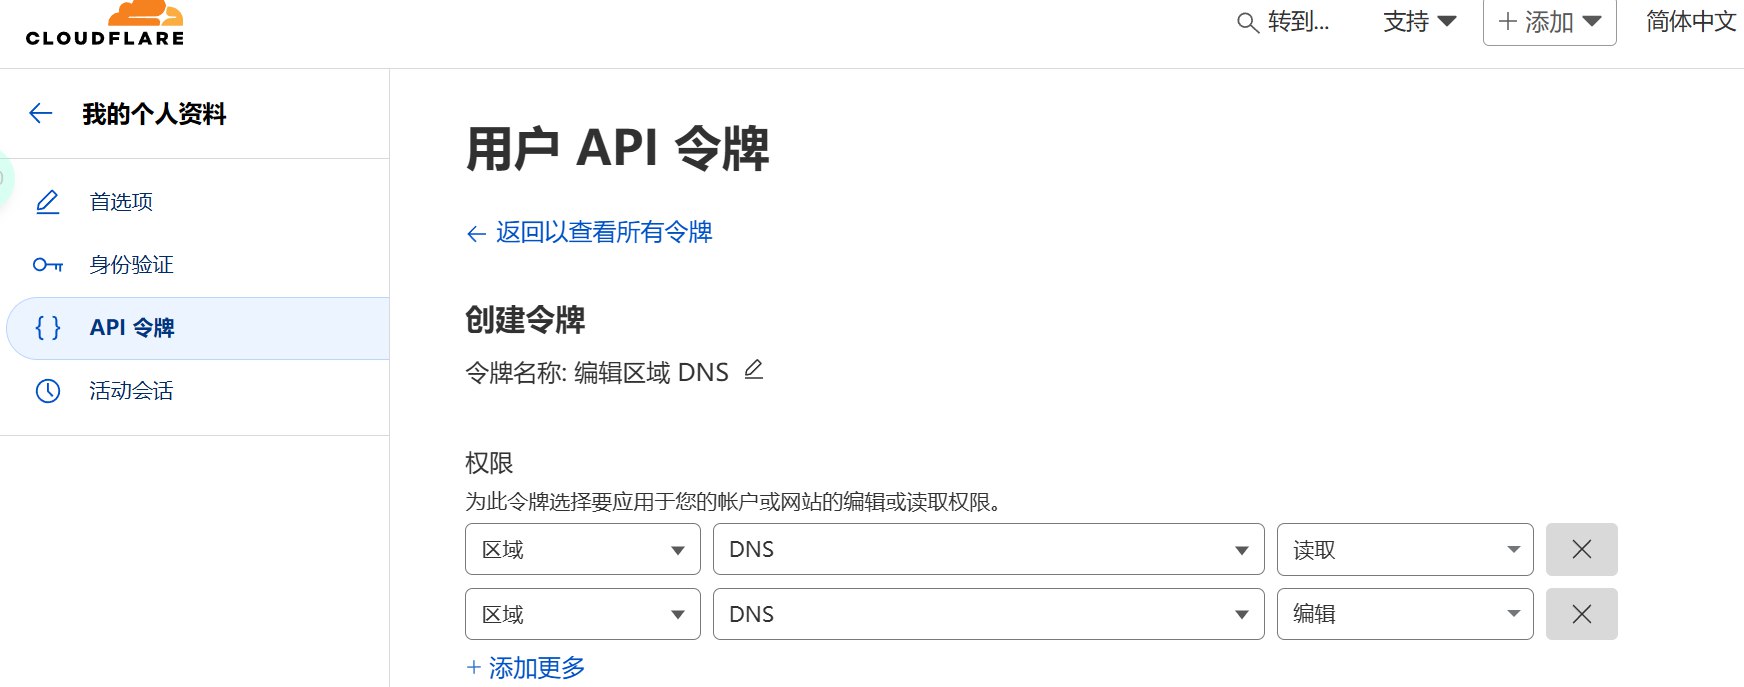
go version创建Cloudflare API Token, 登录
Cloudflare 仪表盘->My Profile->API Tokens, 创建一个新的API Token, 选择编辑区域DNS模板,创建区域DNS读和区域DNS编辑权限就可以了.
caddy.json配置文件参考1
2
3
4
5
6
7
8
9
10
11
12
13
14
15
16
17
18
19
20
21
22
23
24
25
26
27
28
29
30
31
32
33
34
35
36
37
38
39
40
41
42
43
44
45
46
47
48
49
50
51
52
53
54
55
56
57
58
59
60
61
62
63
64
65
66
67
68
69
70
71
72
73
74
75
76
77
78
79
80
81
82
83
84
85
86
87
88
89
90
91
92
93
94
95
96
97
98
99
100
101
102
103
104
105
106
107
108
109
110
111
112
113
114
115
116
117
118
119
120
121
122
123
124
125
126
127
128
129
130
131
132
133
134
135
136
137
138
139
140
141
142
143
144
145
146
147
148
149
150
151
152
153
154
155
156
157
158
159
160
161
162
163
164
165
166
167
168
169
170
171
172
173
174{
"apps": {
"http": {
"http_port": 18002,//如果是通过HTTP申请证书, 这里需要变回80
"https_port": 18003,//reality需要访问的端口
"servers": {
"srvh1": {// 用于http重定向到https, 没有80端口可以删掉结构体
"listen": [
":80"
],
"routes": [
{
"handle": [
{
"handler": "static_response",
"headers": {
"Location": [
"https://{http.request.host}{http.request.uri}"
]
},
"status_code": 301
}
]
}
],
"protocols": [
"h1"
]
},
"srvh2c": {
"listen": [
"127.0.0.1:18003"//和https_port保持一致
],
"listener_wrappers": [
{
"wrapper": "proxy_protocol"
},
{
"wrapper": "tls"
}
],
"routes": [
{
"handle": [
{
"handler": "headers",
"response": {
"set": {
"Strict-Transport-Security": [
"max-age=31536000; includeSubDomains; preload"
]
}
}
},
{
"handler": "reverse_proxy",
"transport": {
"protocol": "http",
"tls": {}
},
"upstreams": [
{
"dial": "speed.cloudflare.com:443"//伪装域名网站
}
],
"headers": {
"request": {
"set": {
"Host": [
"{http.reverse_proxy.upstream.hostport}"
]
}
}
}
}
]
}
],
"tls_connection_policies": [
{
"match": {
"sni": [
"xxxxxx.dpdns.org"//申请证书的域名
]
},
"protocol_min": "1.3",
"protocol_max": "1.3",
"cipher_suites": [
"TLS_ECDHE_ECDSA_WITH_AES_256_GCM_SHA384",
"TLS_ECDHE_ECDSA_WITH_AES_128_GCM_SHA256",
"TLS_ECDHE_ECDSA_WITH_CHACHA20_POLY1305_SHA256"
],
"curves": [
"x25519",
"secp521r1",
"secp384r1",
"secp256r1"
]
}
],
"protocols": [
"h1",
"h2"
]
}
}
},
//通过其他方式获取到证书, 选择直接加载证书文件
//"tls": {
// "certificates": {
// "load_files": [
// {
// "certificate": "/root/caddy/cert.crt",
// "key": "/root/caddy/private.key"
// }
// ]
// }
//}
//--------------------------------------------------------
//通过HTTP(需要放开80端口)获取证书
// "tls": {
// "certificates": {
// "automate": [
// "xxxxxxx.dpdns.org"//需要申请证书的域名
// ]
// },
// "automation": {
// "policies": [
// {
// "issuers": [
// {
// "module": "acme",
// "email": "xxxxxx@gmail.com"
// }
// ]
// }
// ]
// }
//}
//---------------------------------------------------------
//通过证书服务商的DNS绕开80端口,直接申请, 需要api token
"tls": {
"certificates": {
"automate": [
"xxxxxx.dpdns.org"//申请证书的域名
]
},
"automation": {
"policies": [
{
"issuers": [
{
"module": "acme",
"email": "xxxxxxx@gmail.com",
"challenges": {
"dns": {
"provider": {//根据自己情况选择
"name": "cloudflare",
"api_token": "xxxxx"
}
},
"http": {
"disabled": true
},
"tls-alpn": {
"disabled": true
}
}
}
]
}
]
}
}启动caddy
1
2
3
4./caddy run --config caddy.json
./caddy stop --config caddy.json
放进后台
./caddy start --config caddy.jsonreality
xray配置参考,sing-box类似1
2
3
4
5
6
7
8
9
10
11
12
13
14
15
16"streamSettings": {
"network": "tcp",
"security": "reality",
"realitySettings": {
"show": false,
"target": "127.0.0.1:18003",//这里填本地伪装域名的端口
"xver": 0,
"serverNames": [
"xxxxxx.dpdns.org"//自己申请的证书
],
"privateKey": "xxxxxxxxxxxxfeFI",
"shortIds": [
"2xxxxxf"
]
}
}
二、偷邻居(不需要有自己的域名)
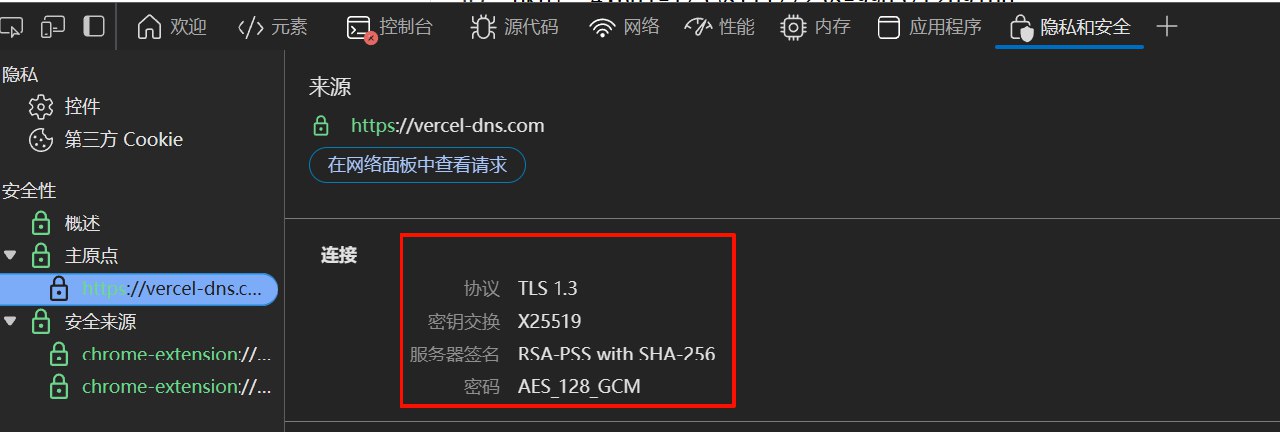
Reality域名获取规则
国内可以访问并且提供国外的IP或者CDN地址(最好不要用CDN地址,用CDN地址会让你的节点成为别人反向代理的加速节点)
出现TLS1.3、X25519代表支持TLS1.3
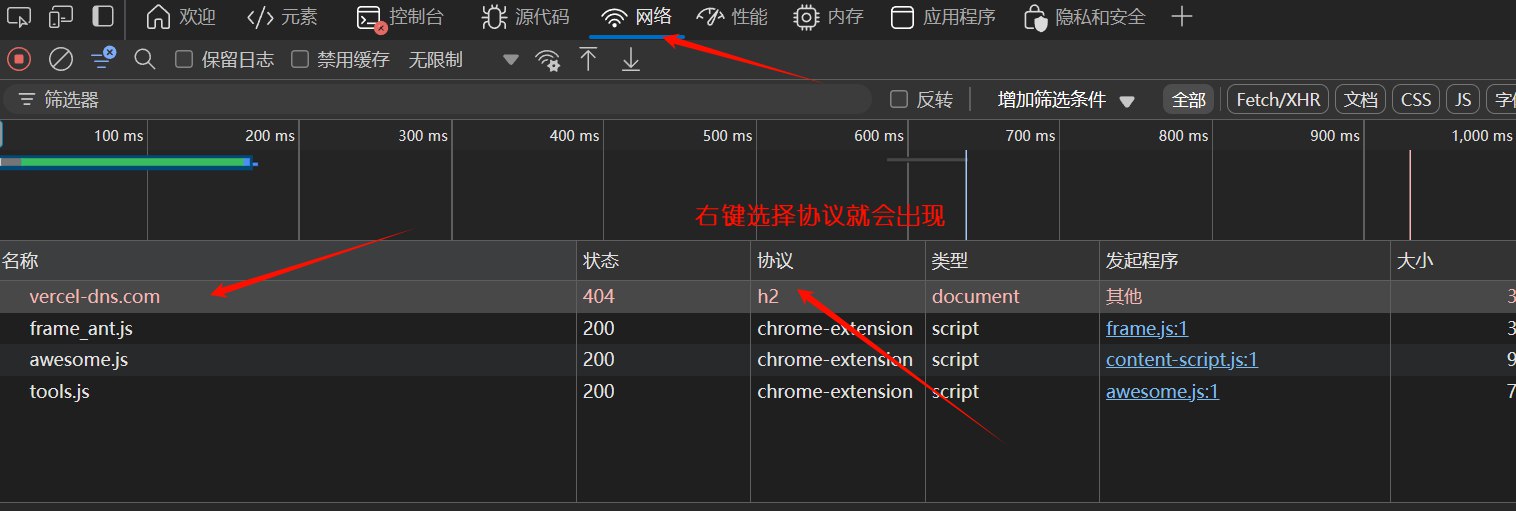
找到 网络/network->all 然后找到当前访问域名的请求协议,如果是h2,则支持h2
检查网站是否使用
Cloudflare CDN, 如果在使用, 最好就不要用这个域名.检查方式: 网站的链接末尾添加
/cdn-cgi/trace. 例如: 你找到网站www.executive-condo.sg符合上诉要求, 此时在后面加上/cdn-cgi/trace, 即:https://www.executive-condo.sg/cdn-cgi/trace, 如果网站提示404, 则表示每套CDN, 可以正常使用, 如果出现json格式的数据内容, 则表明套了CDN, 就不要使用.
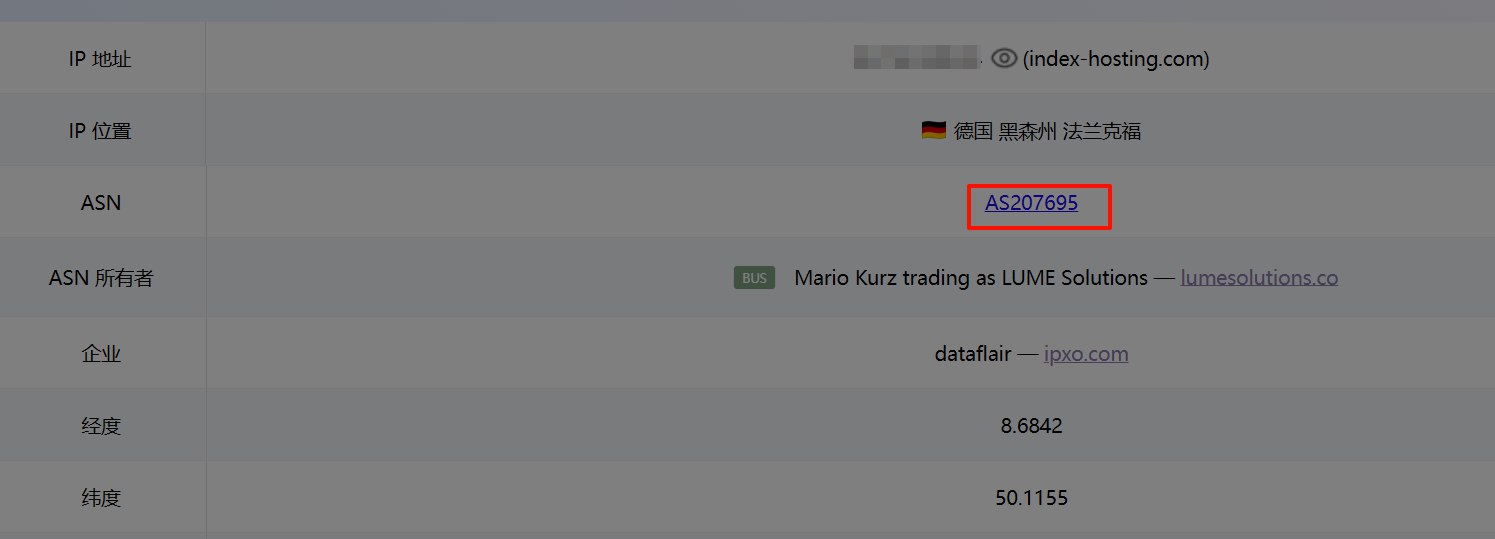
获取服务器ip, 通过ping0.cc可以得到ASN
1
2curl -s4m5 icanhazip.com -k //获取ipv4(如果有)
curl -4 ip.p3terx.com1
2curl -s6m5 icanhazip.com -k //获取ipv6
curl -6 ip.p3terx.com1
https://ping0.cc/ip/获取的ip
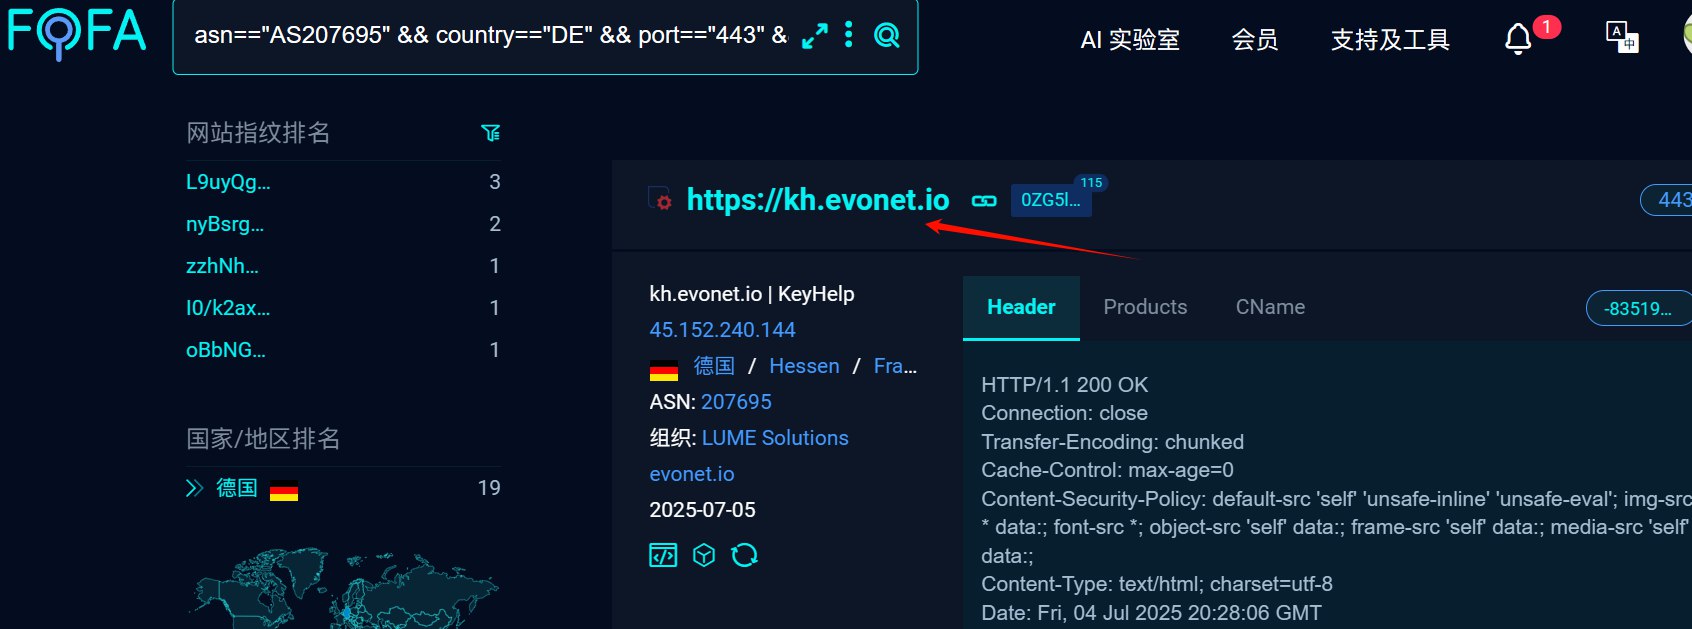
通过FOFA获取到符合reality规则的网站, asn为获取的ASN, 国家换成VPS的国家
1
asn=="AS207695" && country=="DE" && port=="443" && cert!="Let's Encrypt" && cert.issuer!="ZeroSSL" && status_code="200"
点击搜索到的网站链接, 如果本地网络能够正常打开, 就可以使用
三、偷大厂域名
1 | # Apple |
完成上述操作, reality节点搭建就完成了,
可以通过命令./xray run config.json运行内核测试连接
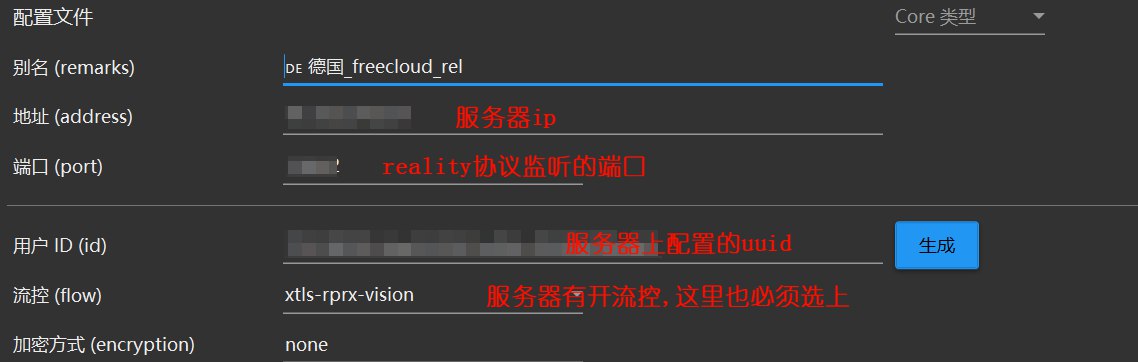
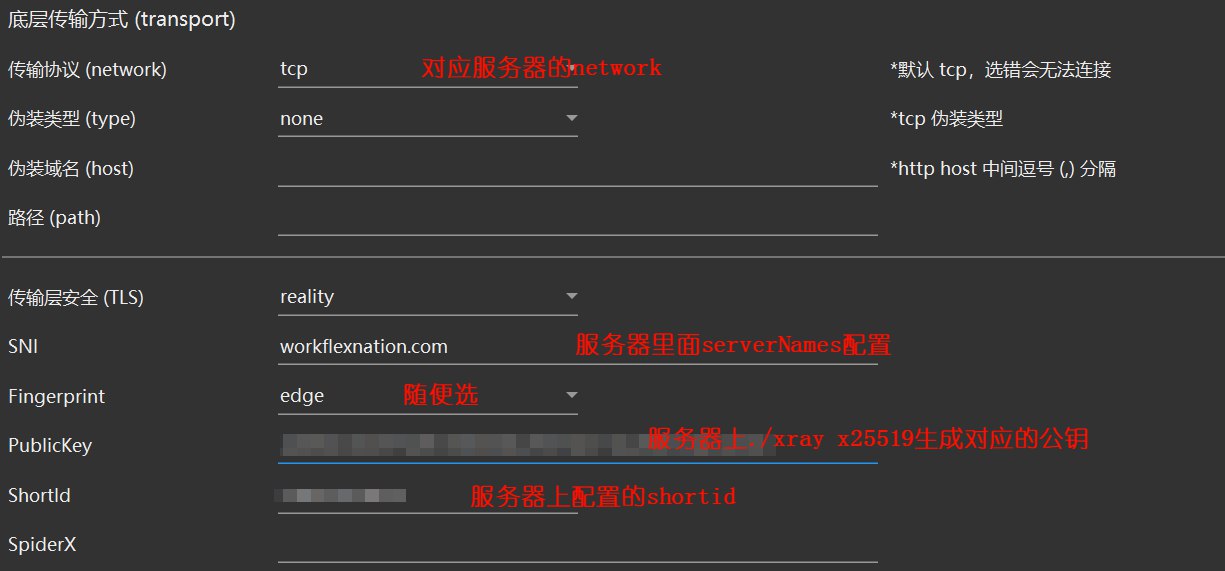
客户端配置
v2rayN 配置:
Clash配置:
1 | - {name: DE_real, server: vps ip, port: 监听端口, reality-opts: {public-key: 服务器./xray x25519生成的公钥, short-id: 服务器上配置的shortid}, client-fingerprint: chrome, type: vless, uuid: 服务器配置的uuid, tls: true, tfo: false, flow: xtls-rprx-vision, servername: 服务器上配置的serverNames, skip-cert-verify: true, udp: true} |
xray-core 在Alpine Linux下开机自启动
进入init.d目录下创建一个
xray文件1
2cd /etc/init.d
vi xray文件内容如下,根据自己环境修改:
1
2
3
4
5
6
7
8
9
10
11
12
13
14
name="xray"
command="/root/xray/xray"
command_args="run -config /root/xray/config.json"
pidfile="/var/run/.xraypid"
command_background="yes"
depend() {
need networking
}启动
xray1
2
3service xray restart //启动xray服务
service xray status //查看服务状态
service xray stop //停止服务xray服务添加开机自启动
检查
xray服务的当前状态和启动级别配置,此时xray服务应该在manual运行级别1
2rc-status
rc-update show添加服务到默认运行级别
1
rc-update add xray default
此时xray就能开机自启动了.